Photoshop怎么压缩png图片_Photoshop压缩png图片流程详解
时间:2020-08-05 11:56:17 责任编辑:tintin

有很多朋友还不会使用Photoshop压缩png图片,所以下面小编就讲解了使用Photoshop压缩png图片的操作过程,来下文看一看吧。

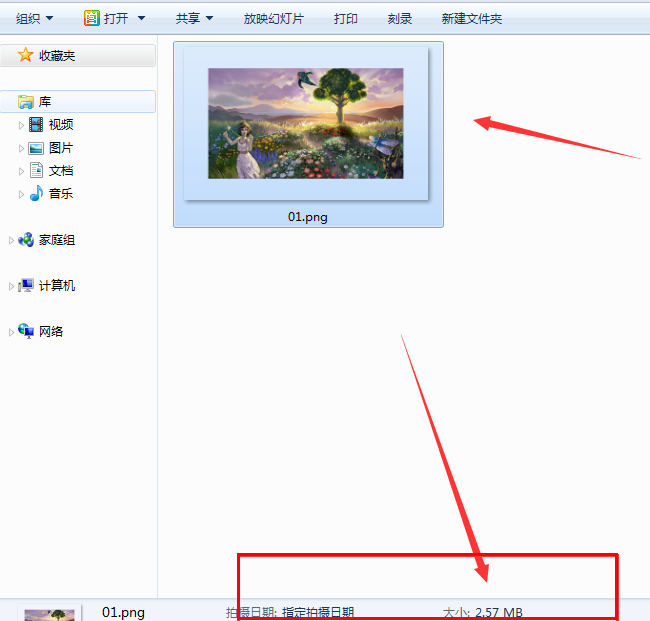
原图,图片大小是2.57MB,
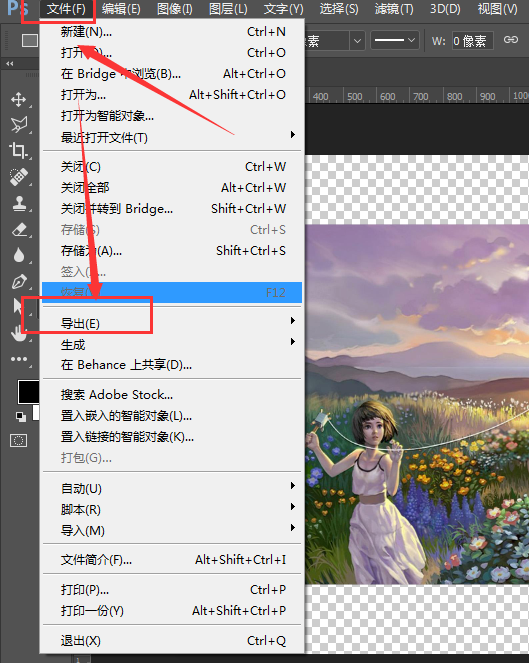
打开Photoshop软件,添加图片,点击菜单栏的【文件】——【导出】选项,
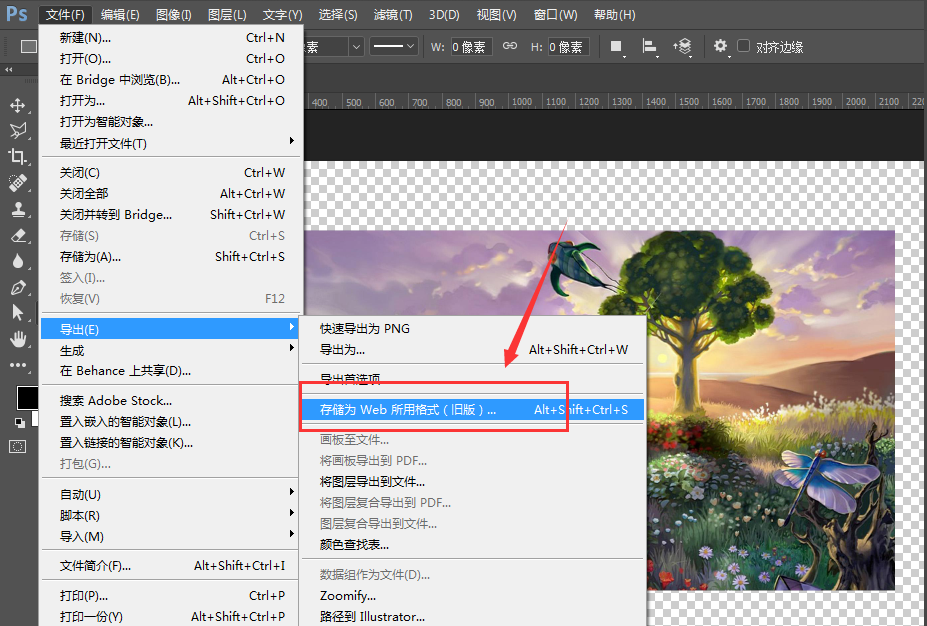
如图,选择【存储为web所用格式】,
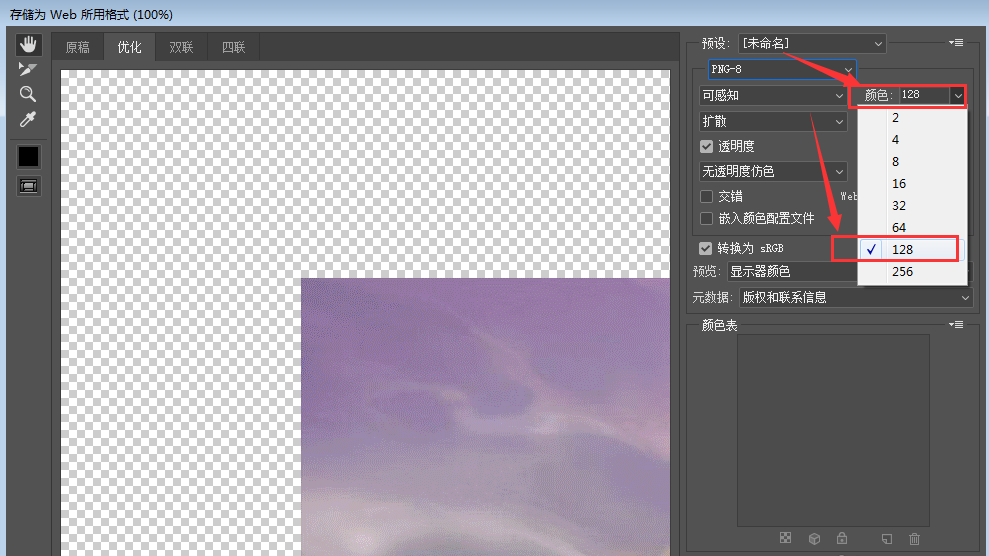
弹出对话框,选择格式类型为PNG-8,如图,
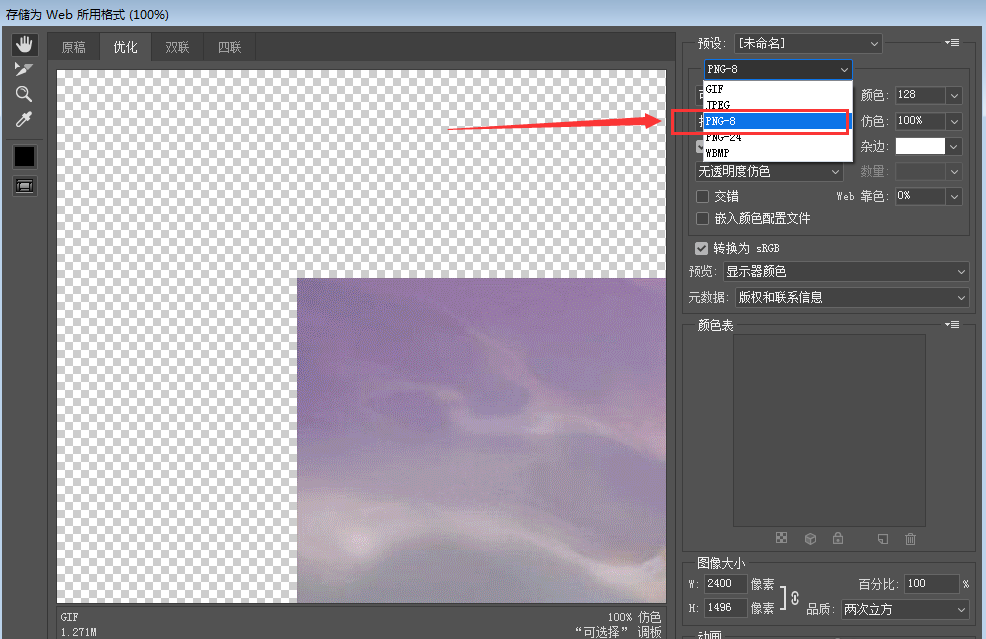
接着选择颜色种类为128,将图片储存导出,
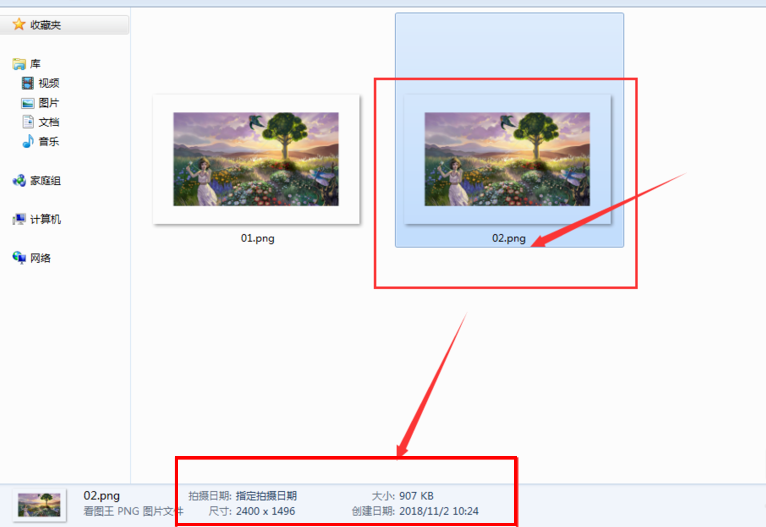
png图片压缩完成,我们可以看到图片大小变成了907KB,而且图片的清晰度并没有受到影响。
上文为你们讲解的Photoshop压缩png图片的具体操作流程,你们是不是都学会了呀!


